Serverless Websockets
Serverless and Websockets seemed an unnatural combination to me, so when I found out it was possible, I had to try it. Serverless is event-driven in its foundation, so instead of unnatural, it appears to be a match made in heaven. In this blog, I show how to set up a serverless websocket with AWS without much code. Easy as a breeze!
TL;DR: You can get a working chat server with just ~120 lines of code (plus 75 for CDK automation). Fast, scalable, and really cheap.
This may appear like a lot at first, but I promise, we only need 120 lines of code to get the basics running: a chat application. Add 75 extra lines and three commands in the terminal, and you have yourself automated deployment via CDK too.
Architecture

High-level serverless WebSocket architecture used in this post.
- Tools: AWS Lambda, API Gateway (WebSocket), DynamoDB, AWS CDK, and plain HTML/JS for the client.
The basics
- An index.html file for the UI
- An API Gateway with Websocket configuration
- Three Lambda functions: connect, send message, disconnect
- A DynamoDB table to store connection IDs
The code
We only need an HTML form and Lambdas to connect, disconnect and send messages. The API Gateway and DynamoDB table are configuration only.
HTML and JS
Let’s write the first 26 lines of code, a simple form. The Stop button isn’t strictly needed: closing your browser window cleans up for you.
<div id="chat-box"></div>
<input type="text" id="message" placeholder="Enter message"/>
<button onclick="connect()">start</button>
<button onclick="sendMessage()">Send</button>
<button onclick="webSocket.close();">Stop</button>
let webSocket;
const chatBox = document.getElementById('chat-box');
const messageInput = document.getElementById('message');
function connect() {
const webSocketURL = 'AWS WEBSOCKET API GATEWAY URL HERE (deploy first with CDK!)';
webSocket = new WebSocket(webSocketURL);
webSocket.onmessage = message => chatBox.innerHTML += '<div>${message.data}</div>';
webSocket.onopen = () => chatBox.innerHTML += '<div>Connected!</div>';
webSocket.onclose = () => chatBox.innerHTML += '<div>Disconnected!</div>';
}
function sendMessage() {
const message = JSON.stringify(messageInput.value);
webSocket.send({message});
messageInput.value = '';
}Lambda’s
We need 3 Lambda’s: one to connect, one to send messages to other connections, and one to disconnect. Below is the core logic for each, written in TypeScript. (Remove types for plain JS, or use as-is with CDK!)
Connect.ts
export const handler = async (event) => {
  const addConnectionParameters = {
    TableName: process.env.TABLE_NAME!,
    Item: {
      connectionId: event.requestContext.connectionId,
      timestamp: new Date().toISOString(),
    }
  };

  try {
    await dynamo.put(addConnectionParameters);
    return { statusCode: 200, body: 'Connected.' };
  } catch (err) {
    console.error('Error during onConnect:', err);
    return { statusCode: 500, body: 'Failed.' };
  }
};
SendMessage.ts
export const handler = async ({ body, requestContext }) => {
  const messageData = JSON.parse(body!);

  const sendMessage = (connectionId: string) => {
      const apiGatewayClient = new ApiGatewayManagementApiClient({
        endpoint: 'https://${requestContext.domainName}/${requestContext.stage}'
      });
      const postCommand = new PostToConnectionCommand({
          ConnectionId: connectionId,
          Data: Buffer.from(JSON.stringify(messageData))
      });
      return apiGatewayClient.send(postCommand);
  };

  const connectionTableName = { TableName: process.env.TABLE_NAME! };
  const connections = await dynamoClient.scan(connectionTableName);

  const sendMessagesToAllConnections = connections.Items?.map((item) => sendMessage(item.connectionId));

  try {
      await Promise.all(sendMessagesToAllConnections!);
      return { statusCode: 200, body: 'Message sent.' };
  } catch (err) {
      console.error('Error during sendMessage:', err);
      return { statusCode: 500, body: 'Failed.' };
  }
};
Disconnect.ts
export const handler = async (event) => {
  const deleteConnectionsParameters = {
    TableName: process.env.TABLE_NAME!,
    Key: { connectionId: event.requestContext.connectionId }
  };

    try {
    await dynamo.delete(deleteConnectionsParameters);
    return { statusCode: 200, body: 'Disconnected.' };
  } catch (err) {
    console.error('Error during onDisconnect:', err);
    return { statusCode: 500, body: 'Failed.' };
  }
};
CDK
CDK is not a requirement, but it makes automated deployment much easier. If you don’t want to use it, just follow the configuration I use here via the AWS web UI.
Install AWS CLI and login:
aws sso login
Install CDK:
npm i -g aws-cdk
Init a new project:
cdk init app --language=typescript
DynamoDB table
const table = new dynamodb.Table(this, 'MessagesTable', {
  tableName: "ChatConnections",
  partitionKey: {
    name: 'connectionId',
    type: dynamodb.AttributeType.STRING
  },
  billingMode: dynamodb.BillingMode.PAY_PER_REQUEST
});
Lambda configuration in CDK
const onConnectLambda = new lambda.Function(this, 'OnConnectLambda', {
  functionName: 'ConnectLambda',
  runtime: lambda.Runtime.NODEJS_20_X,
  handler: 'connect.handler',
  code: lambda.Code.fromAsset(path.join(__dirname, '../lambda')),
  environment: { TABLE_NAME: table.tableName }
});

const onDisconnectLambda = new lambda.Function(this, 'OnDisconnectLambda', {
  functionName: 'DisconnectLambda',
  runtime: lambda.Runtime.NODEJS_20_X,
  handler: 'disconnect.handler',
  code: lambda.Code.fromAsset(path.join(__dirname, '../lambda')),
  environment: { TABLE_NAME: table.tableName }
});

const sendMessageLambda = new lambda.Function(this, 'SendMessageLambda', {
  functionName: 'MessageLambda',
  runtime: lambda.Runtime.NODEJS_20_X,
  handler: 'message.handler',
  code: lambda.Code.fromAsset(path.join(__dirname, '../lambda')),
  environment: { TABLE_NAME: table.tableName }
});
API Gateway WebSocket
const webSocketApi = new apigateway.WebSocketApi(this, 'WebSocketApi', {
  connectRouteOptions: { integration: new integrations.WebSocketLambdaIntegration( 'connect', onConnectLambda ) },
  disconnectRouteOptions: { integration: new integrations.WebSocketLambdaIntegration('disconnect', onDisconnectLambda) },
  defaultRouteOptions: { integration: new integrations.WebSocketLambdaIntegration('message', sendMessageLambda ) }
});

const deploymentStage = new apigateway.WebSocketStage(this, 'DevelopmentStage', {
  webSocketApi,
  stageName: 'dev',
  autoDeploy: true
});

// Output the WebSocket URL
new CfnOutput(this, 'WebSocketUrl', { value: deploymentStage.url });
Run Commands
| Folder Structure example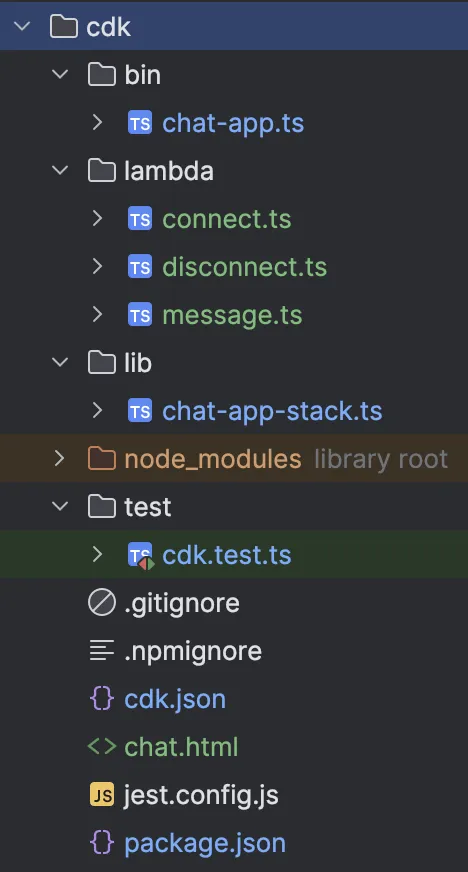 Folder structure of the files in the project |
The console will output the websocket URL—paste it into your HTML file to test.
If you see errors or get lost, you can always clone the finished project on GitHub and try from there!
Conclusion
This websocket setup is easy! We hardly wrote any code and got this cool serverless setup that is super cheap and reliable. It feels awesome and makes reactive applications truly reactive. Note: Max message size is 128kb, so for large files use S3 or HTTP and send notifications through websockets. If you are building an application with websockets I recommend reading up on event-driven architectures as that is a great fit.

View full code and CDK configs on GitHub